
BestProductsForMen.org participates in affiliate programs, which means we may earn a commission if you click on a link and make a purchase. This comes at no additional cost to you. We only recommend products we personally trust, use, or believe will provide value to our readers.
Our goal is to provide honest, helpful reviews and recommendations so you can make informed decisions.

Key Takeaways
- Stackable plyometric boxes provide a versatile progression system that can take your training from beginner jumps to advanced explosive movements while minimizing injury risk.
- The right box set should match your fitness level, with beginners starting at 12-18 inches and gradually advancing to higher configurations as technique and strength improve.
- Material choice matters significantly—foam offers forgiveness for beginners, wood provides stability for intermediate athletes, while metal suits advanced training environments.
- A proper progression plan spanning 6+ months with strategic height increases can result in up to 40% improvements in vertical jump performance and explosive power.
- Beyond just box jumps, stackable plyometric boxes can transform into versatile training stations for over 30 different exercises targeting your entire body.
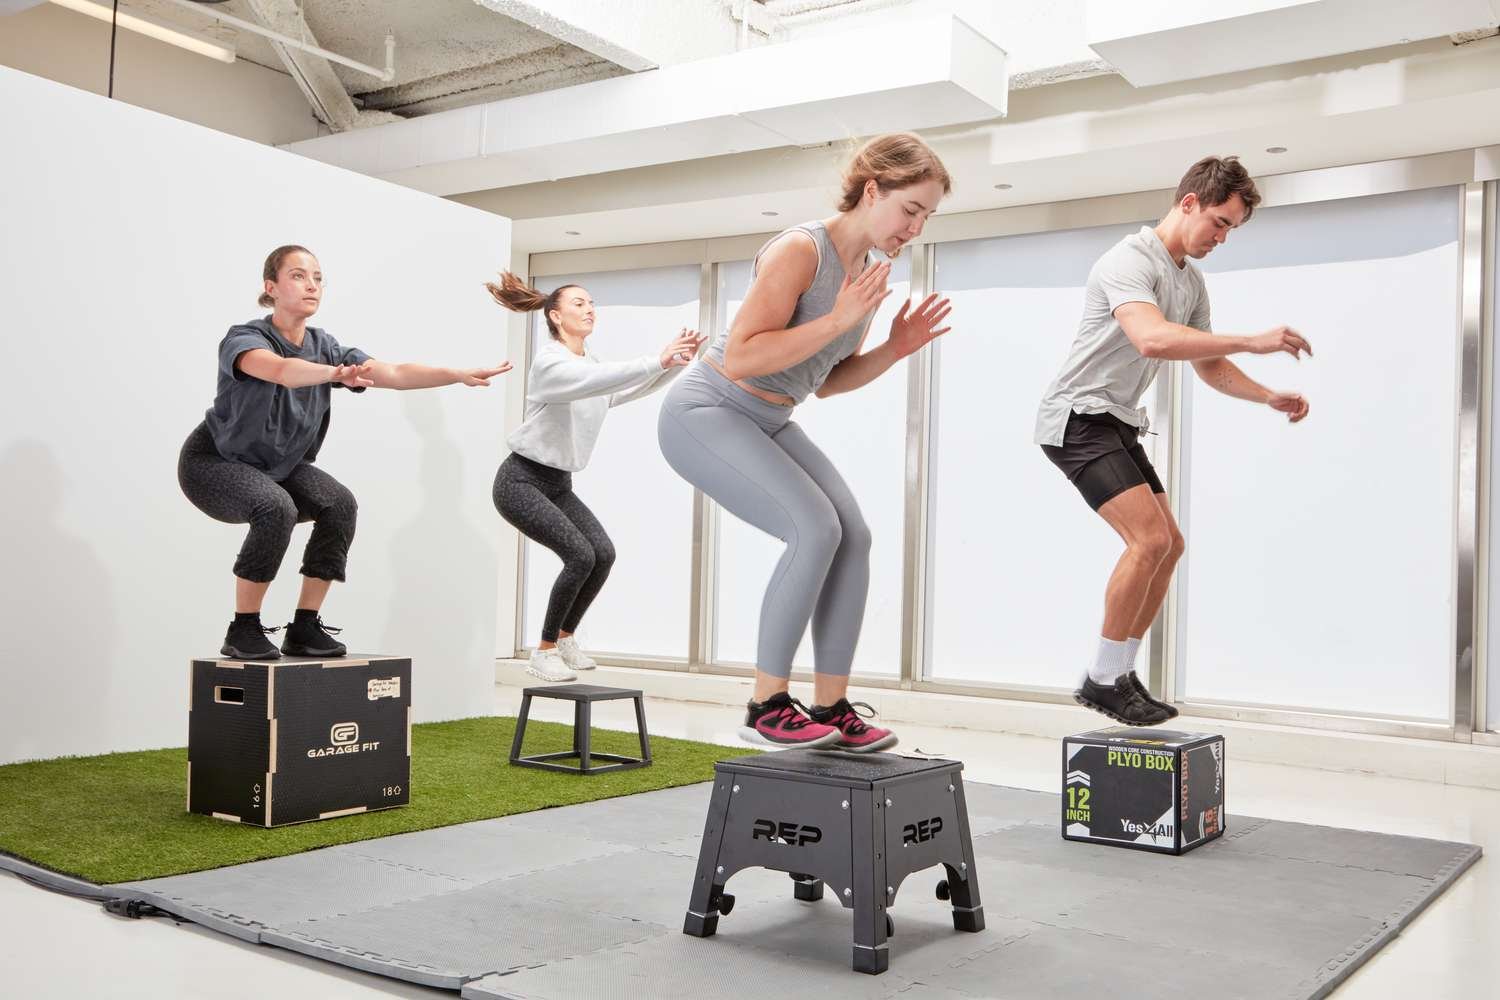
Jump higher. Move faster. Explode with power. These aren’t just wishful training outcomes—they’re the measurable results that come from a well-designed plyometric training program. At the heart of effective plyometric training lies a simple yet powerful tool: stackable plyometric boxes.
Whether you’re a beginner looking to build your first home gym setup or a seasoned athlete wanting to level up your explosive power, stackable plyometric boxes offer a progressive training solution that grows with your abilities. With proper progression strategies, these versatile tools can transform not just your vertical leap, but your overall athletic performance.
The beauty of stackable boxes is their adaptability—they eliminate the need to purchase new equipment as your skills advance while providing a safe platform to progressively challenge your body’s explosive capabilities. Let’s break down exactly how to use these game-changing training tools to their full potential.
For an inexpensive option, I looked at Amazon’s options
Why Stackable Plyometric Boxes Are Game-Changers for Your Training
“The 8 Best Plyo Boxes of 2026, Tested” from www.verywellfit.com
Unlike fixed-height boxes that limit your progression, stackable plyometric boxes create a customizable training system that evolves as you do. This modular approach allows for micro-progressions—adding just an inch or two when you’re ready—rather than forcing intimidating 6-8 inch jumps in height that can lead to plateaus or injuries. For those looking to complement their plyometric training, exploring smart compact rowing machines can provide an excellent cross-training option.
The science behind plyometric training centers on the stretch-shortening cycle, where muscles rapidly stretch before contracting to produce maximum force. Research in the Journal of Strength and Conditioning shows that properly programmed plyometric training can increase vertical jump height by 15-40% over 8-12 weeks. Stackable boxes enable the precise progression needed to achieve these results safely.
Plyometric Training Benefits
↑ Explosive power
↑ Neuromuscular coordination
↑ Athletic performance
↑ Caloric burn (up to 800 calories/hour)
↑ Lower body strength
↓ Risk of athletic injuries
Beyond just jump training, these boxes double as versatile training stations. From step-ups and Bulgarian split squats to decline push-ups and core exercises, a single stackable set can replace multiple pieces of gym equipment. This versatility makes them particularly valuable for home gyms with limited space or budget constraints. For more information, check out this complete guide to plyo boxes.
Choosing the Right Stackable Plyometric Box Set
“for Crossfit Workout …” from Amazon
Selecting the perfect stackable box set requires consideration of your current fitness level, training goals, and space limitations. A comprehensive set typically includes 3-5 different height options that can be combined to create multiple configurations. The ideal starter set should provide heights ranging from 12 inches up to 30 inches to accommodate a wide range of movements and progression levels.
Consider your training experience carefully when making your selection. If you’re completely new to plyometrics, a set that starts lower (perhaps 6-12 inches) will be safer and more accessible. Intermediate athletes might want a set with middle ranges (18-24 inches), while advanced athletes can benefit from higher options (24-36 inches) for challenging variations.
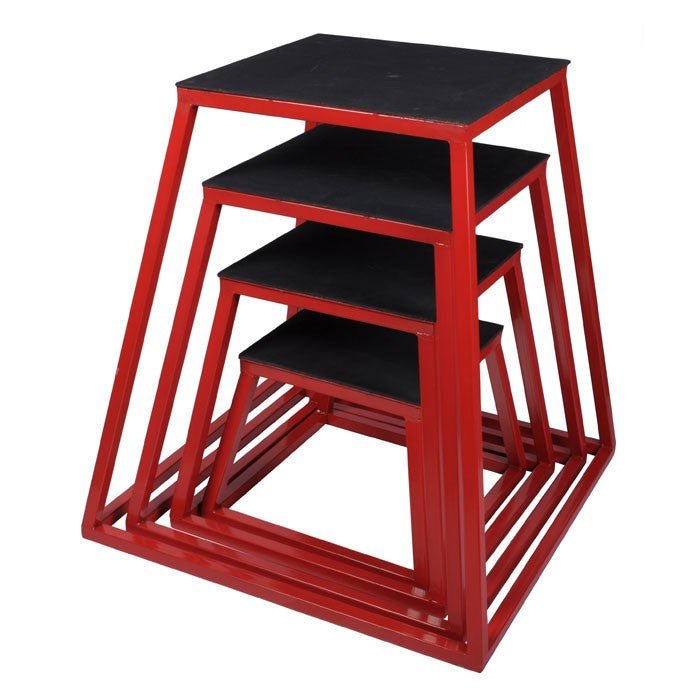
Materials Matter: Wood vs. Foam vs. Metal Options
Each material offers distinct advantages based on your training style and experience level. Foam boxes, with their forgiving surface, are ideal for beginners or those with joint issues—providing confidence during initial training phases and reducing injury risk if you miss a jump. Wood boxes offer excellent stability and durability, making them perfect for consistent, long-term training, though they require more technical precision to avoid shin scrapes. Metal boxes provide maximum durability for high-volume commercial settings but typically come at a premium price point and offer less forgiveness upon impact.
Height Ranges to Look For
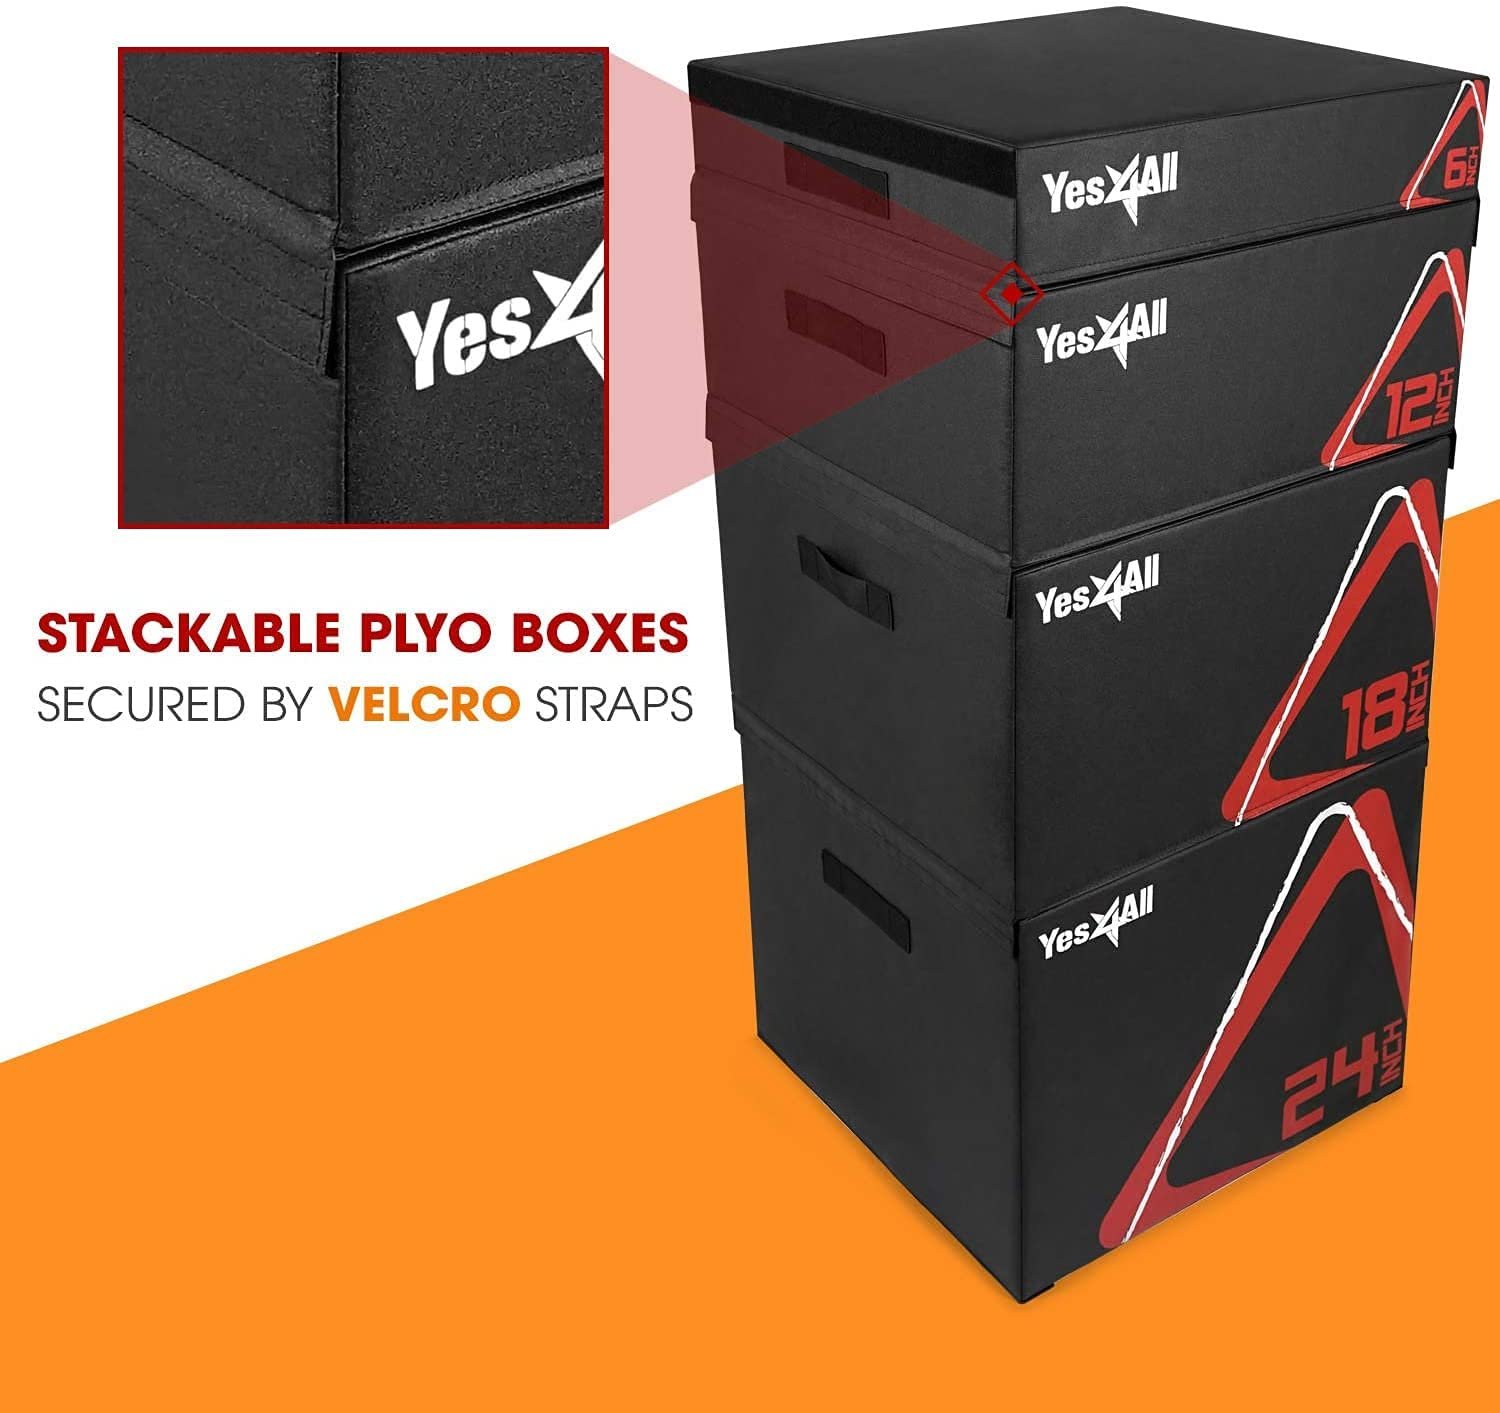
An ideal stackable system offers incremental height options that allow for methodical progression. For beginners, look for a set that includes heights of 12″, 18″, and 24″, which provides adequate challenge without overwhelming novice jumpers. Intermediate athletes benefit from configurations that allow 20″, 24″, and 30″ setups, which target the sweet spot for most training adaptations. Advanced athletes should seek systems that can be configured up to 36″ or higher, allowing for maximal power development and sport-specific training adaptations.
Stability Features That Prevent Accidents
Safety features should never be overlooked when selecting plyometric boxes. High-quality stackable sets include interlocking mechanisms that prevent shifting during use—a critical feature when you’re landing with your entire body weight at high velocity. Non-slip surfaces provide secure footing during takeoff and landing phases, reducing the chance of slips that could result in injury. Some premium options include rubber feet to prevent floor damage and eliminate box movement during intense sessions.
Weight capacity becomes increasingly important as you advance to more dynamic movements. Budget options might support only 250-300 pounds, which may be insufficient when factoring in landing forces that can multiply your body weight. Commercial-grade boxes typically offer 700+ pound weight capacities, providing ample support for even the most explosive movements performed by larger athletes.
Corner design matters significantly for safety and performance. Traditional boxes feature sharp 90-degree corners that can cause painful shin scrapes during missed attempts. Modern designs incorporate rounded or angled corners that minimize injury risk while maintaining structural integrity. This seemingly small detail can make a dramatic difference in training confidence, especially when attempting new height challenges. For those interested in versatile fitness equipment, consider exploring fitness rebounder trampolines for an alternative workout option.
- Beginner sets should prioritize stability and forgiveness (foam or wood with rounded corners)
- Intermediate sets should balance durability with progression options (wood with interlocking features)
- Advanced sets should maximize stability and height options (commercial-grade wood or metal with precision height increments)
- All levels benefit from non-slip surfaces and clear height markings
Beginner’s Journey: First 8 Weeks With Plyometric Boxes
Starting your plyometric training journey requires patience and methodical progression. The first 8 weeks are critical for building proper movement patterns, conditioning your connective tissues, and establishing a foundation that will support more advanced training later. Begin with 1-2 plyometric sessions per week, integrating them after a thorough warm-up and before any heavy strength training to ensure maximum neural recruitment.
The initial phase should focus on mastering technique rather than seeking maximum height. Even elite athletes revisit fundamentals regularly to ensure efficiency in their movements. Record yourself performing basic jumps to analyze your landing mechanics—your knees should track over your toes with a soft landing that disperses force evenly.
Starting Heights for Different Fitness Levels
Your optimal starting height depends significantly on your current athletic ability, body composition, and training history. For true beginners with minimal athletic background, start with step-ups and step-downs on a 12″ box to develop basic movement patterns and confidence. Recreational athletes with some training experience can typically begin with 18″ box jumps, focusing on perfect landings with each repetition. Those with extensive strength training backgrounds might start at 20-24″, but should still prioritize landing mechanics over height in these early stages. For more guidance on effective training equipment, consider exploring smart compact rowing machines to complement your plyometric training.
Women typically benefit from starting 2-4″ lower than men of comparable fitness levels due to biomechanical differences, though this is merely a starting point—individual capabilities vary widely. The key indicator you’ve chosen an appropriate height: you can land softly with knees bent at approximately 90 degrees, maintaining perfect balance without excessive forward lean.
4 Foundation Exercises to Master First
Basic box jumps form the cornerstone of plyometric box training, teaching you to generate force through triple extension of the ankles, knees, and hips. Begin in an athletic stance with feet shoulder-width apart, then drop into a quarter squat before explosively extending upward, landing softly with knees bent to absorb impact. Perform 3 sets of 5-8 repetitions with full recovery between sets.
Step-ups develop unilateral strength and stability crucial for more advanced movements later. Place one foot completely on the box, drive through that heel to lift your body while maintaining an upright torso, then control your descent back to the starting position. Aim for 2-3 sets of 10-12 repetitions per leg.
Box squats teach proper depth perception and develop posterior chain strength. Position the box behind you at a height that allows for parallel thigh position at the bottom, lower under control until you lightly touch the box (without fully sitting), then drive upward to standing. Complete 3 sets of 8-10 repetitions, focusing on maintaining tension throughout the movement.
Lateral step-ups introduce frontal plane stability essential for athletic movement. Stand sideways to the box, place the nearest foot on top, drive through that foot to lift your body while keeping your hips level, then control your return to the starting position. Perform 2-3 sets of 8-10 repetitions per side.
Common Mistakes That Lead to Injury
Landing with straight legs creates dangerous impact forces that can damage knee cartilage and lead to chronic pain. Always land with “soft knees” that bend to absorb force like shock absorbers. Excessive forward lean during landings indicates you’re attempting heights beyond your current capabilities—scale back until you can maintain proper posture throughout the movement. For those looking to enhance their workouts safely, consider exploring compact home gym kits that can help you train effectively at home.
Neglecting proper warm-up is particularly dangerous for plyometric training. Your tissues need adequate preparation for the high-velocity contractions involved in jumping. Include 5-10 minutes of light cardio, followed by dynamic stretching and movement preparation exercises that mimic the jumping patterns at lower intensity. For more detailed guidance, check out this complete guide on plyo boxes.
Progressive overload is essential, but rushing progression leads to technique breakdown and potential injury. Add height only when you can perform current jumps with perfect form for 2-3 consecutive workouts. Remember that plyometric training stresses not just muscles but connective tissues that adapt more slowly—patience prevents potentially season-ending injuries.
When to Progress to the Next Height
Follow the “stick it” rule before advancing: you should be able to land a jump and freeze in the landing position for 3 seconds without wobbling or balance adjustments. This demonstrates complete control of the movement. Track the height-to-ground-contact-time ratio—as you improve, you’ll generate more height with less ground contact time before takeoff, indicating readiness for increased challenge. For those looking to enhance their home workout setup, consider exploring compact home gym kits to complement your plyometric training.
Typically, beginners should spend 3-4 weeks at each height before considering an increase. When ready to progress, add just 2-4 inches rather than making large jumps. This incremental approach allows your nervous system and connective tissues to adapt safely while still providing enough stimulus for continued improvement. For those interested in enhancing their home workout setup, consider exploring compact home gym kits as a versatile option.
Intermediate Training: Months 2-6
Once you’ve built a solid foundation, it’s time to implement more challenging variations that develop multi-directional power and increase training complexity. This intermediate phase, typically spanning months 2-6, introduces greater movement variety, combination drills, and more sport-specific training applications. Your weekly training frequency can increase to 2-3 plyometric sessions, with greater emphasis on quality over quantity.
At this stage, your stackable boxes become even more valuable as you’ll begin using multiple heights within the same workout. This approach allows you to train different power outputs and movement patterns in a single session—mimicking the varied demands of athletic competition. Your total weekly volume should range from 80-120 foot contacts, distributed across your plyometric training days.
Progressive Overload Techniques
Height progression remains important but becomes just one of several variables you can manipulate. Consider implementing contrast training by alternating between heavy strength movements (like barbell squats) and plyometric exercises, which research shows can enhance power development by up to 15% compared to either method alone. Volume progression should follow a wave-like pattern—increasing for 2-3 weeks, then decreasing for 1 week—allowing for adaptation while preventing overtraining.
Complexity progression introduces coordination challenges that develop athletic skill transfer. Begin with simple directional changes like lateral box jumps, then advance to rotational jumps that require multi-planar stability and power. Speed progression focuses on reducing ground contact time while maintaining or increasing jump height—a critical factor for athletic performance improvement.
| Progression Variable | Implementation Strategy | Example Progression |
|---|---|---|
| Height | Increase 2-4″ when current height is mastered | 18″ → 20″ → 24″ over 8 weeks |
| Volume | Add 10-15 foot contacts every 2 weeks | 60 → 75 → 90 total contacts |
| Complexity | Add directional changes or combinations | Forward jumps → Lateral jumps → 180° jumps |
| Density | Reduce rest periods while maintaining quality | 90 sec → 75 sec → 60 sec between sets |
5 Combo Movements to Build Explosive Power
Box jump-to-broad jump combinations challenge your ability to transition between vertical and horizontal power expression. Begin standing in front of your box, perform a standard box jump, step down carefully, then immediately execute a maximal effort broad jump. This combination trains your body to rapidly generate force in different directions—a crucial skill for multi-directional sports. Perform 3-4 sets of 4-6 repetitions with full recovery between sets.
Depth drop-to-box jump sequences develop reactive strength and elastic power. Stand on a 12-18″ box, step off (don’t jump), land softly with both feet, then immediately explode upward onto a second box. The minimal ground contact time between landing and jumping trains your stretch-shortening cycle to store and release energy efficiently. This advanced drill should be introduced gradually with just 2-3 sets of 4-5 repetitions, as it places significant stress on your neuromuscular system.
Lateral box shuffle-to-jumps enhance agility and lateral power production. Begin alongside your box, perform three rapid lateral shuffles, then explode sideways onto the box, landing with both feet simultaneously. This movement develops the change-of-direction capabilities essential for court and field sports. Start with 2-3 sets of 3-5 repetitions per side, maintaining perfect form throughout each repetition.
5 Combo Movements to Build Explosive Power
Box jump-to-broad jump combinations challenge your ability to transition between vertical and horizontal power expression. Begin standing in front of your box, perform a standard box jump, step down carefully, then immediately execute a maximal effort broad jump. This combination trains your body to rapidly generate force in different directions—a crucial skill for multi-directional sports.
Depth drop-to-box jump sequences develop reactive strength and elastic power. Stand on a 12-18″ box, step off (don’t jump), land softly with both feet, then immediately explode upward onto a second box. The minimal ground contact time between landing and jumping trains your stretch-shortening cycle to store and release energy efficiently.
Lateral box shuffle-to-jumps enhance agility and lateral power production. Begin alongside your box, perform three rapid lateral shuffles, then explode sideways onto the box, landing with both feet simultaneously. This movement develops the change-of-direction capabilities essential for court and field sports.
Box jump burpees combine cardiovascular conditioning with explosive power training. Start in front of the box in a standing position, drop into a burpee with a push-up, then as you return to standing, transition immediately into a box jump. This compound movement increases workout density while challenging your body to generate power in a fatigued state.
Multi-height ascending/descending jumps train variable power output. Set up your stackable boxes in ascending (or descending) order with 2-3 feet between each. Perform consecutive jumps across all boxes with minimal rest between jumps, training your body to adjust force production based on the challenge presented. Start with just 2-3 boxes and add more as your conditioning improves. For those interested in enhancing their workout routine, consider incorporating smart compact rowing machines to complement your plyometric training.
Adding Resistance to Basic Box Jumps
Weighted vests provide distributed resistance that minimally alters your jumping mechanics while increasing the load your body must overcome. Begin with just 5-10% of your bodyweight and focus on maintaining the same jump height and landing quality you achieve unweighted. This method develops power without significantly compromising movement patterns.
Dumbbell or kettlebell jumps require holding weights at your sides during box jumps. This variation increases lower body power production while also challenging your grip strength and upper body stability. Start extremely light (5-10 lbs per hand) and prioritize smooth, controlled movements over weight. As you progress, you’ll develop the dynamic stability needed for advanced athletic movements.
Resistance bands anchored under your feet or to a fixed point behind you add accommodating resistance that increases throughout the movement. This technique forces greater acceleration through the full range of motion and can be particularly effective for athletes looking to improve their speed-strength. Begin with light tension and increase gradually as your power output improves. For more insights on enhancing explosive power, check out this ultimate guide for explosive training.
Advanced Progressions: Taking It to Pro Level
At the advanced stage, typically after 6+ months of consistent plyometric training, your focus shifts to maximizing power transfer to sport-specific movements. Your stackable boxes become tools for creating complex training environments that challenge your body’s ability to generate, absorb, and redirect force in unpredictable patterns. Training frequency can increase to 2-4 sessions weekly, though volume per session often decreases as intensity increases. For those interested in enhancing their home workout setups, consider exploring compact home gym kits to complement your plyometric training.
The key to advanced programming is variable stimulus—your body adapts most effectively when facing novel challenges. Combine heights, directions, and loading patterns within workouts to create an endless progression of increasingly complex movements. Recovery between sets lengthens at this stage, sometimes up to 2-3 minutes, to ensure maximum quality and output in each effort. For those setting up a home workout space, exploring compact home gym kits can provide the versatility needed for such diverse training routines.
Single-Leg Variations
Single-leg box jumps represent a significant increase in difficulty, requiring approximately 80% more force production per leg compared to bilateral jumps. Begin with a box roughly half the height of your standard bilateral jump height, and focus on perfect landings with your knee tracking over your toes. This variation addresses bilateral strength imbalances while developing unilateral power critical for running and jumping sports.
Alternating single-leg bounds-to-box develop horizontal power conversion to vertical force. Start several feet back from the box, perform a single-leg bound forward, then immediately transition into a single-leg jump onto the box. This advanced movement chain trains your body to redirect momentum—a fundamental athletic skill required in virtually all sports involving rapid direction changes. For those interested in exploring other athletic activities, consider checking out singles group travel meetups for an adventurous twist.
Lateral single-leg hops develop frontal plane stability and power—often the limiting factor in athletic performance and injury prevention. Position yourself alongside a low box (12-18″), balance on your outside leg, then hop laterally onto the box, landing on the same leg. Start with just 2 sets of 3-5 repetitions per side, gradually increasing as your neuromuscular control improves.
Multi-Box Sequences
Ascending/descending box circuits test your ability to modulate power output based on changing demands. Arrange 3-5 boxes of increasing heights (then decreasing heights) in a circuit pattern. Perform continuous jumps with minimal rest between boxes, forcing your neuromuscular system to rapidly assess and adjust power needs. This mimics the variable power demands of competitive sports and develops instinctive force production. For a more comprehensive workout, consider incorporating compact home gym kits to enhance your training routine.
Box-to-box lateral sequences enhance multi-directional agility. Position 3-4 boxes in a square or diamond pattern with 3-4 feet between each. Perform continuous lateral jumps from box to box, following a predetermined pattern that becomes increasingly complex. This drill develops the spatial awareness and rapid motor programming required for high-level athletic competition.
Reaction-based sequences introduce cognitive challenges alongside physical demands. Have a training partner call out random box numbers or directions, forcing you to process information while executing explosive movements. This combination of mental and physical training prepares you for the decision-making demands of competitive sports where movements must be executed while processing game information.
Integrating Other Equipment
Medicine ball slams combined with box jumps develop full-body power chains. Position yourself with a medicine ball behind your box, slam the ball forcefully to the ground, then immediately channel that upper body power into a maximal box jump. This integration trains your body to coordinate upper and lower body power production—a critical skill for throwing athletes and combat sports.
Battle rope waves followed by box jumps challenge your ability to maintain power output through upper body fatigue. Perform 10-15 seconds of intense battle rope waves, then immediately transition to box jumps. This combination develops the mental fortitude and physical resilience needed to express power under fatigue—mimicking late-game situations in competitive sports. For those looking to enhance their workout setup, consider exploring compact home gym kits to efficiently incorporate these exercises into your routine.
Box jumps into suspension trainer catch positions train plyometric power with body control endpoints. Perform a box jump, step down, then immediately jump into a suspended position on TRX or similar straps (like a fallout or L-sit). This advanced combination develops the body awareness and control needed to express power safely within sporting environments where landings aren’t always predictable.
Sport-Specific Drills Using Stackable Boxes
Basketball-specific progressions might include box jumps immediately followed by shot simulations or defensive slides. Arrange boxes to mimic game-specific movement patterns, such as jumping then immediately transitioning into lateral movement. Add a basketball to increase sport specificity, catching and passing after box jumps to develop hand-eye coordination alongside power development.
Football/soccer training can incorporate box jumps into changing-direction drills. For defensive backs or midfielders, perform a box jump followed immediately by a 5-yard backpedal and cut. For receivers or forwards, jump onto a box, down the opposite side, then immediately accelerate into a sprint—simulating jumping to win possession then breaking away from defenders.
Volleyball and track athletes benefit from depth jumps into attack movements. After landing from a depth jump, immediately transition into a spike approach or sprint start. This combination trains the body to utilize the stretch-shortening cycle optimally for sport-specific power expression, maximizing transfer from training to competition performance.
Programming Your Box Progression Workouts
Effective programming requires balancing intensity, volume, and frequency to maximize adaptations while preventing overtraining. Follow a periodized approach where plyometric intensity increases while volume decreases during power development phases, then reverses during endurance or metabolic conditioning phases. Most athletes benefit from 2-3 dedicated plyometric sessions weekly, separated by at least 48 hours to allow for complete neuromuscular recovery.
Position your plyometric training strategically within both your weekly schedule and individual workouts. Place high-intensity plyometrics after thorough warm-ups but before strength training or metabolic conditioning to ensure maximum neural drive and technical execution. Schedule your most demanding plyometric sessions following your lightest strength days to ensure quality movement patterns.
Weekly Schedule Templates
For beginners, a twice-weekly approach provides sufficient stimulus while allowing ample recovery. Place these sessions on Monday and Thursday, performing 4-5 basic movements for 3 sets each, with total foot contacts not exceeding 60-80 per session. Focus on perfect technique rather than maximal effort, with emphasis on landing mechanics and stability.
Intermediate athletes can progress to three weekly sessions (Monday, Wednesday, Friday) with increased complexity. Each workout can target different movement patterns—vertical, horizontal, and lateral power development respectively. Total foot contacts can increase to 80-120 per session, with increased emphasis on combination movements and sport-specific applications.
Advanced trainees benefit from an undulating approach with varying intensities throughout the week. A sample schedule might include: Monday (high intensity, low volume), Wednesday (moderate intensity, moderate volume), and Friday (low intensity, high volume). This approach allows for maximal adaptation while managing cumulative fatigue effectively.
Volume and Intensity Guidelines
Total foot contacts serve as the primary volume metric for plyometric training. Beginners should limit total weekly contacts to 80-120, intermediates can progress to 120-180, and advanced athletes might handle 140-220, depending on training goals and recovery capacity. Remember that higher intensity movements (like depth jumps) count as multiple foot contacts due to their increased neuromuscular demand.
Intensity can be manipulated through box height, movement complexity, additional resistance, or reduced ground contact time. For most athletes, only one of these variables should be increased at a time. When introducing a new movement pattern, reduce other intensity variables temporarily until proficiency is developed.
Rest periods should be matched to training goals. For maximal power development, allow 45-90 seconds between sets and 2-3 minutes between different exercises. For power-endurance development, reduce rest periods to 30-60 seconds between sets while maintaining movement quality. Complete recovery between high-intensity plyometric sets is essential for quality training—rushing between sets compromises technique and increases injury risk.
Recovery Protocols Between Sessions
Active recovery techniques significantly improve recovery between plyometric sessions. Light cycling, swimming, or walking the day following intense plyometrics promotes blood flow without additional impact stress. Implement 10-15 minutes of focused soft tissue work on calves, quads, hamstrings, and glutes to address common areas of tightness from jumping movements.
Contrast therapy alternating between hot (2 minutes at 100-104°F) and cold (1 minute at 50-60°F) immersion can reduce muscle soreness and accelerate recovery when performed within 1-2 hours post-training. For a less intensive approach, simply elevating your legs against a wall for 5-10 minutes after workouts promotes venous return and reduces lower limb swelling from high-impact training.
Nutrition strategies should emphasize rapid glycogen replenishment and protein synthesis. Consume 20-30g of protein and 40-60g of carbohydrates within 30 minutes of completing your plyometric session. Hydration status dramatically impacts connective tissue resilience—aim for urine that is consistently light straw-colored to ensure adequate hydration for optimal recovery.
Breaking Through Plateaus With Stackable Boxes
Even well-designed programs eventually lead to plateaus as your body adapts to the training stimulus. When progress stalls, systematic variation becomes crucial for continued development. The versatility of stackable boxes provides numerous options for breaking through plateaus without completely restructuring your training program.
Rather than simply increasing height—which eventually becomes counterproductive—look to manipulate other variables like movement complexity, training density, or box configurations. Often, lateral adaptations (developing power in new directions or movement patterns) prove more effective than continuing to push vertical limits beyond your biomechanical efficiency range.
Changing Box Configurations
Alternating box heights within sets challenges your body’s ability to modulate power output. Set up three boxes of different heights (e.g., 18″, 24″, 30″) and perform jumps in random sequences called out by a training partner. This variable stimulus prevents neurological adaptation and forces continuous recalculation of force production requirements.
Obstacle course configurations transform standard box jumps into complex movement challenges. Arrange multiple boxes with varying spaces between them, requiring combinations of jumps, bounds, and directional changes to navigate the course. Time your completions to introduce competitive elements that push intensity beyond what standard set-rep schemes might accomplish.
Unstable surface adaptations introduce proprioceptive challenges that develop deeper neuromuscular control. Place stability cushions or foam pads on top of boxes to create slightly unstable landing surfaces that require greater stabilization upon landing. Start with very low heights when first introducing this advanced technique, as it significantly increases the difficulty and required body control.
Modifying Rest Periods
Cluster sets involve performing your standard set volume in smaller micro-sets with brief intra-set rest periods. Rather than 8 consecutive box jumps, perform 2 jumps, rest 15 seconds, and repeat 4 times. This approach maintains higher power output throughout the set while still accumulating the desired training volume, often breaking through plateaus in explosive power development.
Contrast rest periods alternate between incomplete and complete recovery within workouts. Perform your first 2-3 sets with full recovery (90+ seconds), then reduce rest periods for the next 2-3 sets (30-45 seconds), before returning to full recovery for the final sets. This varied approach challenges different energy systems while maintaining quality movement patterns. For those setting up a workout space at home, consider the benefits of compact home gym kits to complement your training regimen.
Active rest protocols replace passive standing between sets with complementary movements that enhance recovery while developing supporting qualities. Between box jump sets, perform mobility work for ankle dorsiflexion, hip flexion, or thoracic extension—movement capacities that directly support jumping performance. This approach increases workout density without compromising power output on primary movements.
- For power development plateaus: Increase rest periods to 2-3 minutes while focusing on maximum height/effort
- For conditioning plateaus: Decrease rest periods gradually (90s → 75s → 60s) while maintaining movement quality
- For technical plateaus: Implement contrast training with technical drills during rest periods
- For motivational plateaus: Introduce partner competitions or timed challenges between sets
Incorporating Speed Work
Linear sprint-to-jump combinations develop acceleration power that transfers directly to sport performance. Perform a 10-yard sprint directly into a box jump without hesitation, training your body to convert horizontal momentum into vertical force. This combination challenges your deceleration capabilities and power redirection—crucial skills for virtually all field and court sports that require stopping and jumping in rapid succession.
Safety First: Protect Yourself While Pushing Limits
Plyometric training carries inherent risks due to its high-impact nature and the significant forces generated and absorbed during jumps. Implementing proper safety protocols isn’t just about preventing injuries—it’s about creating an environment where you can confidently push your limits without unnecessary risk. Your stackable boxes should be placed on non-slip surfaces with ample space around them for safe landings and bailouts if necessary. For those considering setting up a home gym, comparing compact home gym kits vs complete system setups can provide valuable insights into creating a safe and efficient workout space.
Progress systematically rather than sporadically. Adding just 2″ of height every 2-3 weeks while maintaining perfect form will produce dramatically better results than attempting 6-8″ increases that compromise technique and safety. Remember that connective tissues adapt more slowly than muscles—what feels muscularly possible might still place unsafe stress on tendons and ligaments that aren’t yet conditioned for the load.
Proper Landing Technique
The “quiet landing” principle should guide all plyometric work. Your landings should make minimal noise, indicating forces are being properly absorbed rather than transmitted through joints. Land mid-foot to forefoot, never on your heels, with knees tracking over toes and hips sitting back slightly to engage posterior chain muscles in force absorption. For those interested in incorporating other fitness methods, consider exploring fitness rebounder trampolines as an alternative workout.
Arm position significantly impacts landing stability. Keep arms slightly forward during landings to maintain your center of gravity over your base of support. Common errors include arms swinging wildly to the sides or dropping completely, both of which compromise balance during the critical landing phase.
The landing-to-takeoff ratio should be appropriate for your training level. Beginners should spend more time in the landing position (1:3 takeoff-to-landing time ratio), focusing on stability and force absorption. Advanced athletes can progress toward a 1:1 ratio for more reactive training, but only after mastering the fundamentals of safe landing mechanics.
Creating Safe Training Spaces
Arrange your stackable boxes with safety zones of at least 4 feet on all sides, ensuring space for bailouts or missed jumps. For higher boxes or more advanced drills, consider placing softer flooring materials or crash mats around your training area to reduce impact forces if you miss a jump.
When to Scale Back Intensity
Recognize the warning signs that indicate you should reduce training intensity: decreasing jump height within sets, deteriorating landing mechanics, increased ground contact time, or joint discomfort that persists between repetitions. Any of these signals suggest your neuromuscular system is fatiguing beyond its current recovery capacity, increasing injury risk without providing additional training benefits.
Take Your Athletic Performance to New Heights
Stackable plyometric boxes represent one of the most versatile and effective training tools for developing explosive power, athletic agility, and sport-specific performance. By following a structured progression from foundational movements to advanced sport-specific drills, you can systematically build the physical capabilities that translate directly to improved athletic performance in virtually any sport or physical endeavor.
Remember that consistency trumps intensity in the long run. A methodical approach with gradual progression will produce dramatic improvements in jumping ability, reactive strength, and overall athletic capacity while minimizing injury risk. Your stackable boxes provide the perfect platform for this journey—adaptable to your current level while offering endless possibilities for future development. For more advanced training protocols and personalized progression strategies, explore comprehensive plyometric training systems that can take your athletic development to professional levels.
Frequently Asked Questions
Plyometric training generates numerous questions, particularly regarding safety, progression, and implementation strategies. The following answers address the most common concerns athletes have when incorporating stackable plyometric boxes into their training programs. For those interested in diversifying their workout routines, consider exploring rebounder trampolines as an alternative or complement to plyometric exercises.
Understanding these fundamental aspects of plyometric training will help you implement a safer, more effective box progression that maximizes results while minimizing injury risk. Remember that individual factors like training history, body composition, and recovery capacity all influence optimal progression rates and training frequencies.
How high should my first plyometric box be as a beginner?
Most beginners should start with a 12-18″ box, with women and smaller individuals typically starting at the lower end of this range. The ideal height allows you to land with knees bent at approximately 90 degrees while maintaining perfect balance and alignment. If you’re landing with nearly straight legs or excessive forward lean, the box is too low; if you’re unable to land softly with control, it’s too high. Focus on quality movement patterns rather than maximum height during the first 4-8 weeks of training.
Can I use stackable plyometric boxes for exercises other than jumping?
Absolutely! Stackable boxes excel as versatile training stations for dozens of non-jumping exercises. They’re perfect for step-ups, Bulgarian split squats, decline push-ups, box pistol squats, elevated planks, box dips, seated shoulder presses, and core exercises like knee tucks and L-sits. Their adjustable height makes them ideal for regression/progression of many bodyweight movements, effectively replacing multiple pieces of equipment in space-constrained training environments.
How often should I do plyometric box training each week?
Most athletes benefit from 2-3 dedicated plyometric sessions weekly with at least 48 hours between sessions. Beginners should start with just 1-2 sessions featuring 40-60 total foot contacts per workout. Intermediate athletes can progress to 2-3 sessions with 60-100 contacts per workout. Advanced athletes might perform 2-4 weekly sessions with varying intensities and volumes based on their specific training phase. Always ensure quality movement—when technique deteriorates due to fatigue, the session should end regardless of planned volume. For those interested in maximizing their home workout efficiency, comparing compact home gym kits vs complete system setups can provide valuable insights.
What’s the difference between wooden and foam stackable boxes?
Wooden boxes provide excellent stability and durability with clearly defined edges that encourage precise jumping—ideal for intermediate to advanced athletes focused on performance. Foam boxes offer significantly more forgiveness on missed jumps with their padded surfaces reducing the risk of shin scrapes and impact injuries—making them perfect for beginners, rehabilitation settings, or high-volume training environments. Many athletes eventually invest in both types, using foam for learning new movements and wood for established exercises where the psychological safety of foam is no longer needed.
Do I need special shoes for plyometric box training?
While specialized plyometric shoes aren’t necessary, certain footwear characteristics optimize performance and safety. Look for shoes with minimal heel-to-toe drop (0-4mm) that provide a stable platform without excessive cushioning that might compromise proprioception. Cross-training shoes typically offer the ideal balance of lateral stability, moderate cushioning, and traction needed for box jumps and related exercises. Avoid running shoes with thick, soft midsoles that can create instability during landings and takeoffs on firm box surfaces.
The journey from beginner to advanced athlete is paved with consistent, progressive training that challenges your body appropriately at each development stage. Stackable plyometric boxes provide the perfect adjustable platform for this journey, allowing micro-progressions that continuously push your limits while maintaining safety and proper movement patterns. For those interested in diversifying their workout routines, fitness rebounder trampolines are another excellent option to consider.
for an inexpensive option from Amazon
BestProductsForMen.org participates in affiliate programs, which means we may earn a commission if you click on a link and make a purchase. This comes at no additional cost to you. We only recommend products we personally trust, use, or believe will provide value to our readers.
Our goal is to provide honest, helpful reviews and recommendations so you can make informed decisions.
Leave a Reply to Resistance Band Exercises to Break Plateaus Cancel reply